Stem Generation and the Mixer
Song Master gives you the ability to re-mix any song by adjusting the volume and pan position of the various instruments. With the mixer, you can also Solo and Mute, each instrument group.
- This is a great way for you to practice a song in a band setting. Simply mute the instrument you want to play and begin practicing!
- Solo a part to isolate it and hear it better
Generate Stems
To generate stems, first click the Mixer/Stems tab in the bottom section of Song Master:
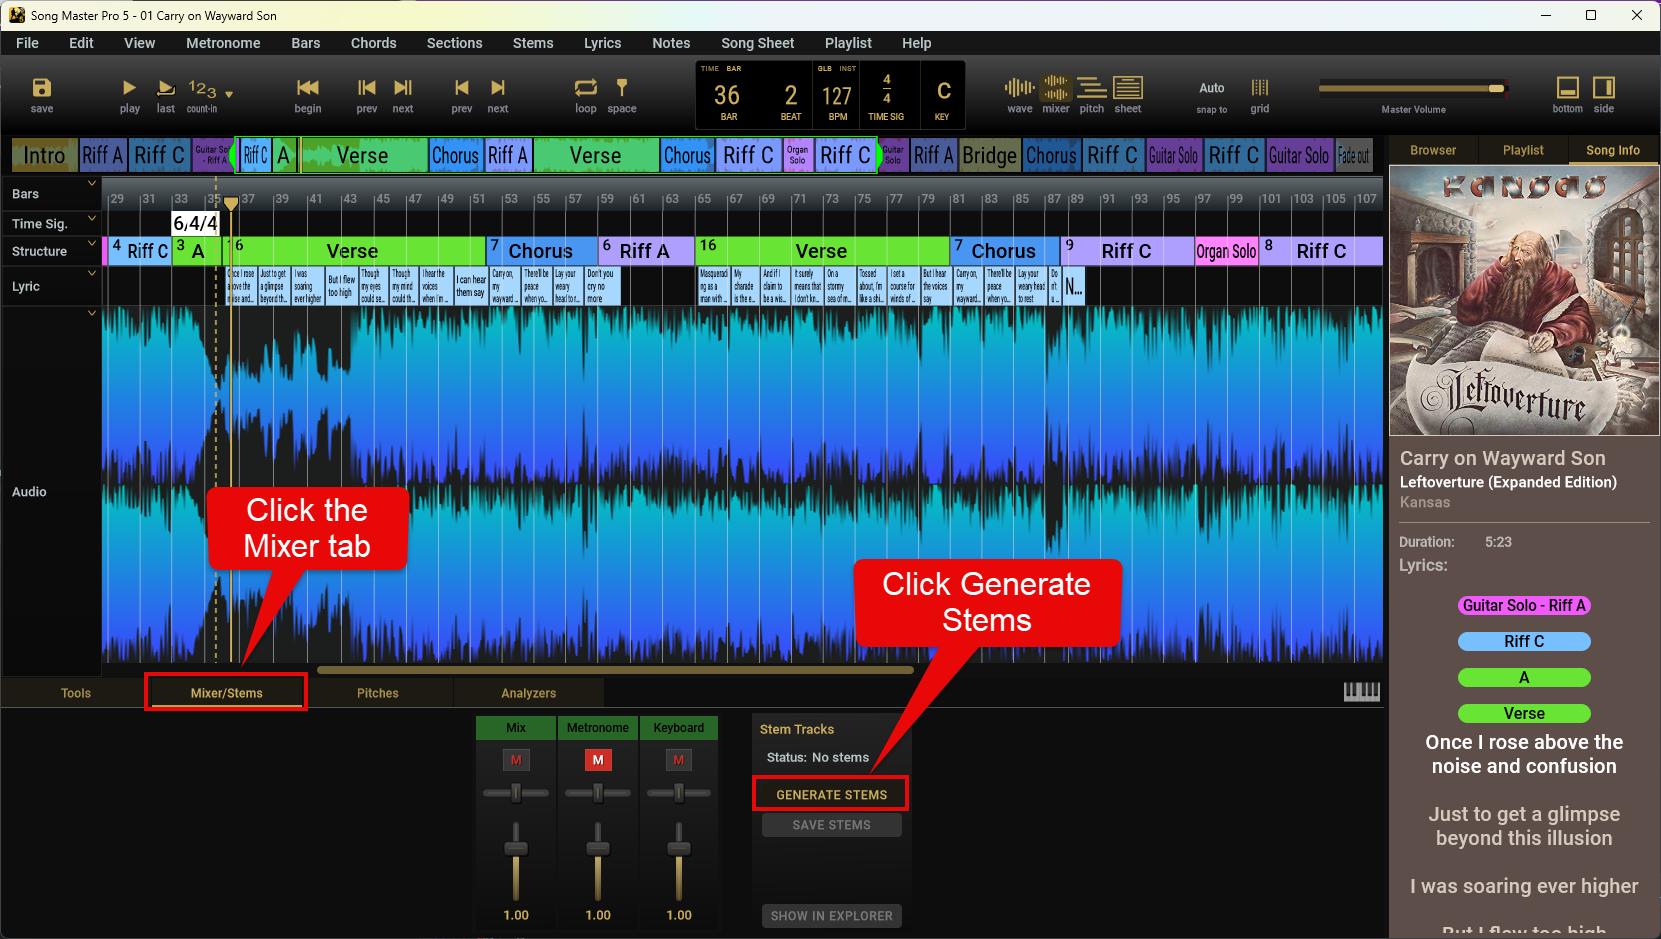
Then click the GENERATE STEMS button and select the stems you want to generate from the dialog.
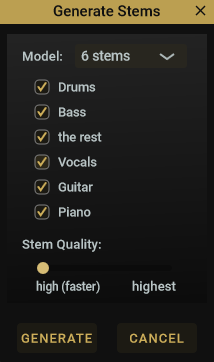
Song Master (non-Pro) includes a 4-stem model only, so it does not display a model selection dropdown at the top of the dialog and doesn't not have the option to generate Guitar and Piano stems.
Song Master Pro includes two Stem Models:
- 4-stem model - Vocals, Drums, Bass, and "the rest"
- 6-stem - Vocals, Drums, Bass, Guitar, Piano, and "the rest"
The 4-stem model generally produces the highest quality, while the 6-stem model separates Guitar and Piano.
The Stem Quality slider, at the bottom of the dialog, let's you select the algorithm's Compute Time vs Quality parameter. High setting is about twice as fast as Highest.
Trident extract stems on your computer so we do NOT send your audio to the cloud for processing. Because of this, the time to extract the stems depends on your cpu.
The stem option labeled the rest is a bit special in that it will contain all of the audio that does not belong to the selected stems. For example, if you just want a vocal track with an accompaniment track, then just select Vocals and the rest. This will result in two audio tracks: a vocal only track and the rest track which will contain all the Drums, Bass, Guitars, Pianos, etc.
When the GENERATE button is clicked, Song Master will do some heavy computations to extract each instrument group into separate tracks. While it is extracting the stems, a Progress Bar estimates the amount of time remaining. The 'X' on the right of the progress bar can be used to abort processing.
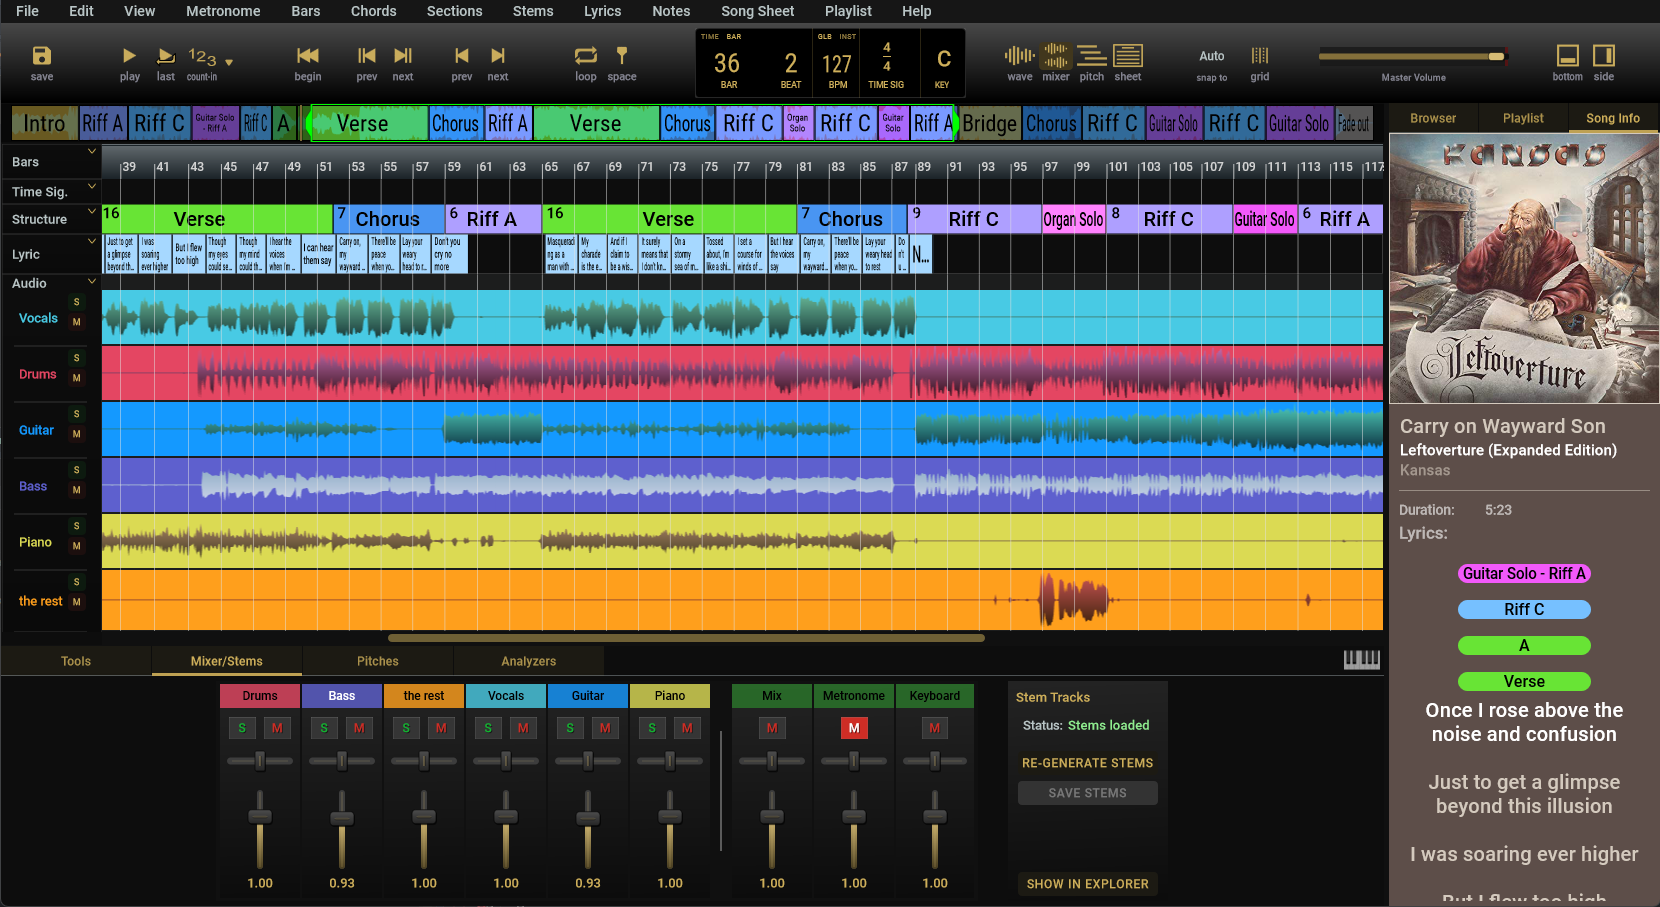
When Song Master finishes generating the stem tracks, you will have a mixer panel for each track. Use the mixer controls to Mute, Solo (mute all other stems), change the Volume and Pan position for each track.
Saving Stems
Stems are automatically saved when the Song is saved. You can manually save stems by clicking the SAVE STEMS button. By default, stems are saved as .flac files (flac uses lossless compression). To save more storage space, you can change the saved format to ogg (similar to mp3) by editing the Stem save format option in the Settings dialog's General tab. You can also save stems as wav files which are uncompressed and, therefore, larger than the other formats. While they are being saved, you can still continue to use Song Master.
You can also change the directory that stems are saved to by going to Settings and changing the Stems Cache Path. If you check the Save Stems to Song project, the Stems will instead be saved to the same location that Song Master's .song file is located.
You can quickly access the separated stems by clicking on the SHOW IN EXPLORER on Windows, SHOW IN FINDER on macos button.
External Stems Support
Song Master has support for playing external stems. If you have existing stem files for a song, you can have Song Master load all the stem files and use the Mixer to mix, solo, and mute the individual tracks.
To load an external set of stem files, right-click the folder in the Audio/Other Browser and select Open as Stems:

All audio files in the folder are assumed to be for the same song and will be loaded.
Support for .mogg files
Some external stem tracks are stored in files with a file extension of ".mogg". This is convenient because all stem tracks are embedded in just one file. However, each track is stored as a single channel track with no panning information. For instance, if guitars are recorded to a left and right stereo pair, a "mogg" file will store them as two mono channels that are panned to the center (and not left/right). It also doesn't supply a label for the tracks so each track gets a generic name.
Editing Options
Reordering Tracks

Drag-n-drop the track headers to re-order tracks in the Mixer view:
Changing the Default Track Order
Re-ordering the tracks in the above way will save the track ordering with the song. However, if you want to set the default ordering for new songs, you need to re-order the tracks in the Label Set Editor:

Changing the Label Set sets the default track order for new songs. If you want to change the ordering in an existing song to use the current Label Set ordering, click the Reset track order from the Audio drop-down menu.
Resizing Tracks
Drag the borders of the track header to change the size of the track:

To reset the all track's heights back to uniform size, click the Audio track header's drop-down menu and select Reset track heights.
Change Track Colors
Click the Audio drop-down menu and select Edit Label Set to display the Label Set Editor and change the tracks colors:

For more information on Label sets, please see the Label Sets doc page.
Remove a Track
You can remove stems that aren't used by right-clicking in the stem track's header
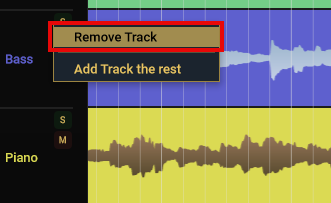
This is useful to remove a track that doesn't have any audio. Removing a track will not include it in the mix. If you only want to temporarily not hear a track, just click its Mute button. Removing a track doesn't not delete stem track so if you accidentally remove a track you can add it back.