Pitches: Audio-to-MIDI (PRO)
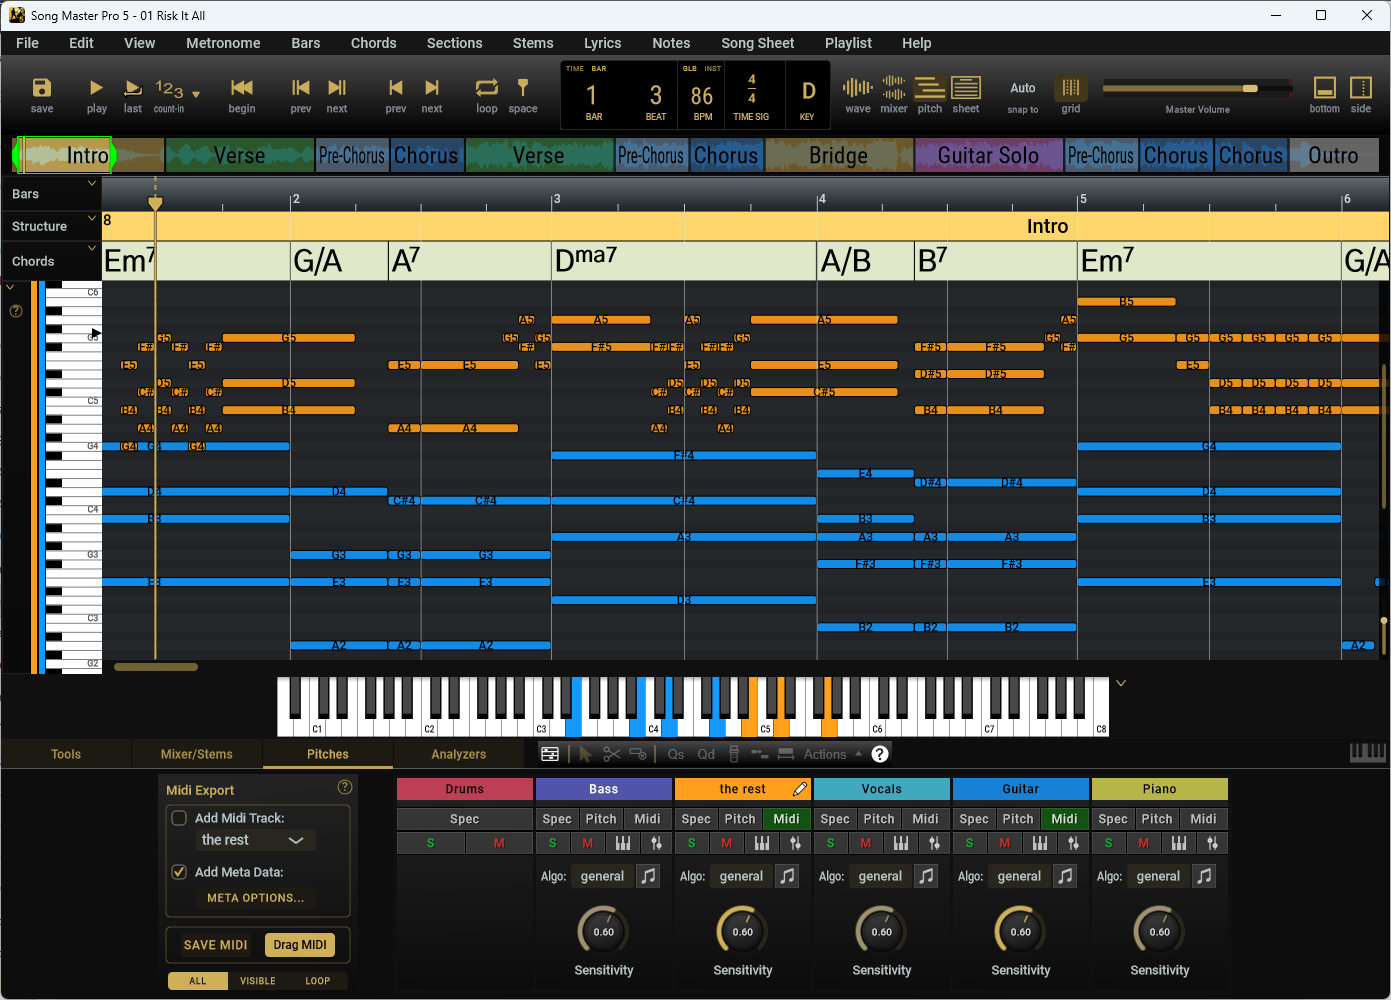
The Pitches Viewer is a useful tool to assist you in transcribing music and for getting a view of how the various parts combine to make the song. It offers three levels of viewing pitch information:
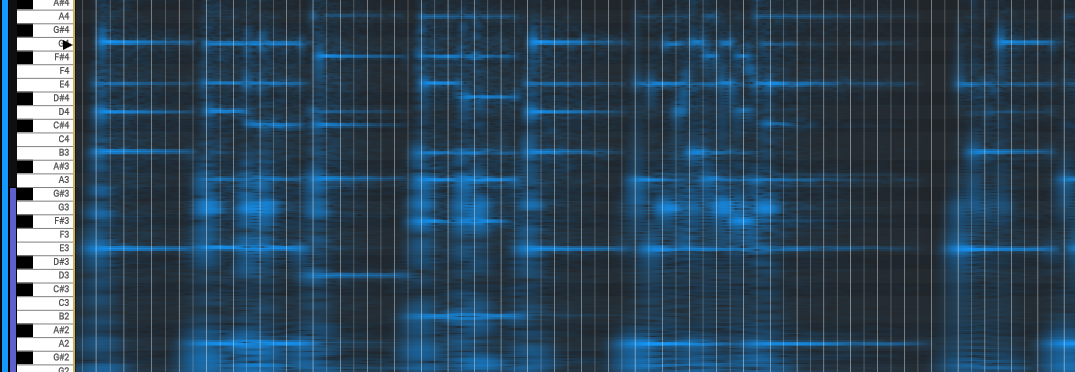
- Spectrogram Layer - this view shows the frequency content present in one or more of the tracks. For melodic instruments, you will see how a note on the instrument is distributed along the harmonic series. Percussive instruments will appear as "smears" along the vertical axis.
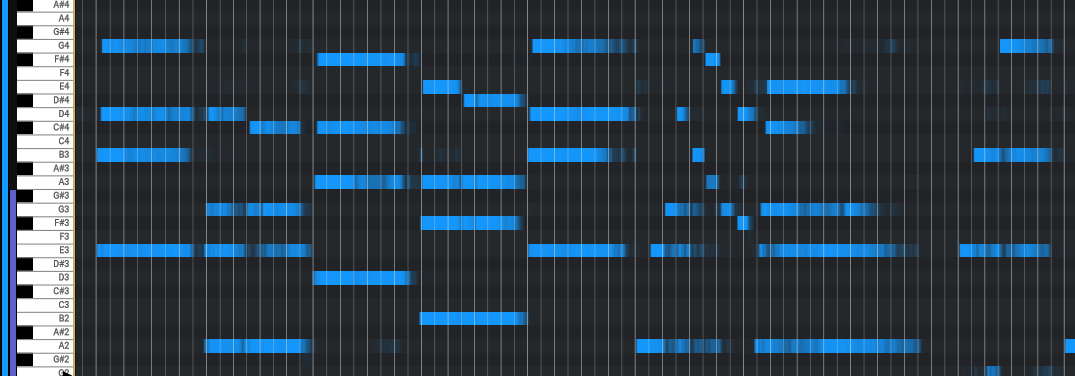
- Pitch Layer - this view shows the results of Song Master processing the raw spectrogram into a more useful form that highlights the probable notes being played.
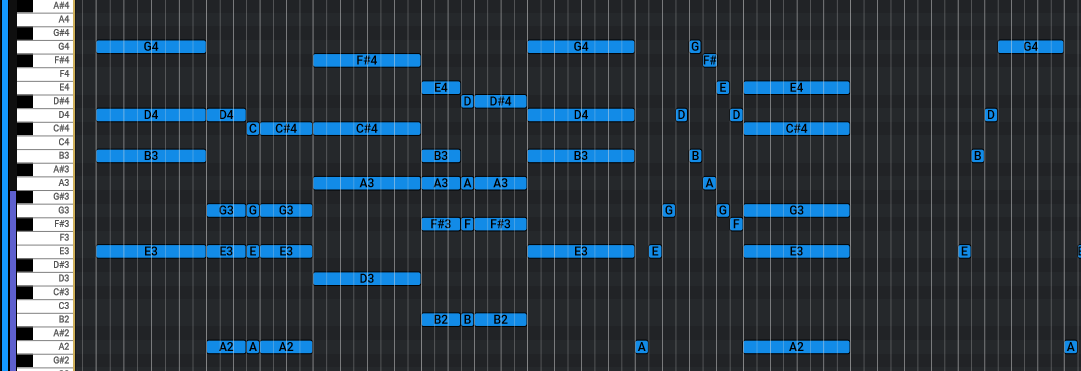
- Midi Layer - the pitches layer is further processed and midi note values are generated. The midi notes can be saved to an external midi file or dragged into a DAW or midi editor for further processing.
These three levels can be computed from a stereo/mono audio track or from Song Master's generated stems and can be viewed in any combination.
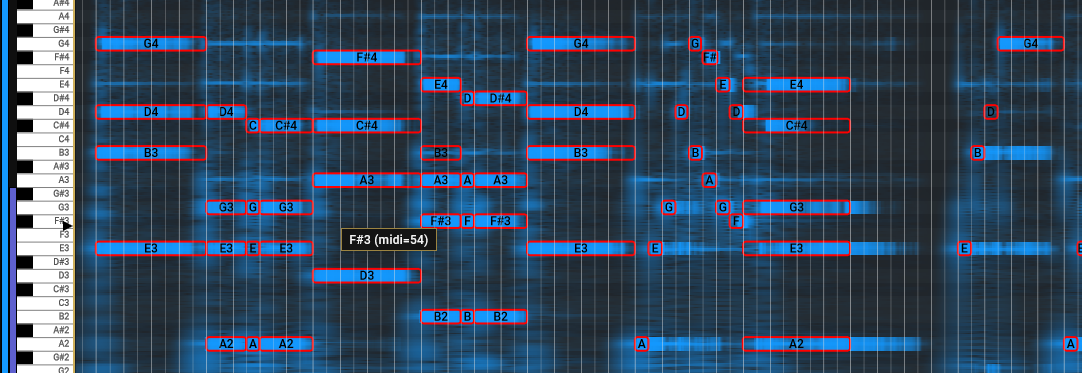
Bottom Pitch Panel
The Pitch tab in the Bottom Panel displays the Midi Export panel and the Tracks Panel. Let's look at the Tracks Panel first; we will discuss the Midi Export panel later.
Tracks panel
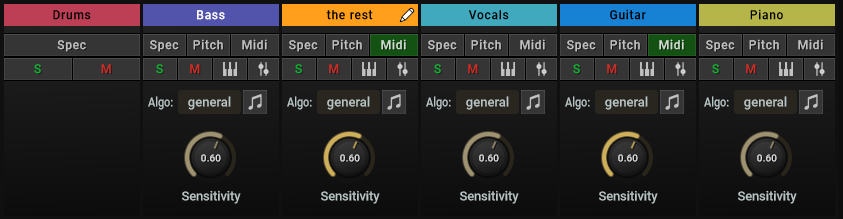
This panel is a bit over-whelming at first glance. Each audio track has a group of controls used to display information in the main display area. Once you learn the controls that are in one sub-section, you will understand how the others work.
Track Controls
Each stem track gets its own set of controls. These controls are grouped into 3 sections: Layer, Audio, and Algo.
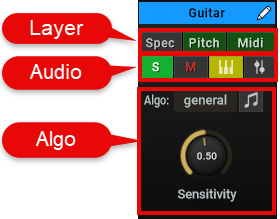
Layer Row
The three text buttons at the top, toggle the data displayed for the track:
- Spec - Displays the Spectogram
- Pitch - Displays the refined pitch spectrogram
- MIDI - Displays and edits midi notes
It is often useful to view both Pitch and Midi layers at the same time since the MIDI layer may filter out useful information that is available in the Pitch layer.
Audio Row
This row of controls manage playing and muting the audio and MIDI data along with controlling their volume and panning.
- S - to Solo the Audio track
- M - to Mute the Audio track
- Midi playback - Toggle playing the MIDI on Song Master Pro's internal Piano
- Play settings - Contains a popup dialog to set the Audio and MIDI playback volume and panning

Algo Section
This section controls the audio-to-MIDI conversion.
- Use the Algo dropdown to select one of Prism's three algorithm.
- general - best for majority of tracks
- guitar dist - use for distored guitars
- grand piano - use for high-end acoustic piano recordings
- The music-note icon will re-run the audio-to MIDI algorithm
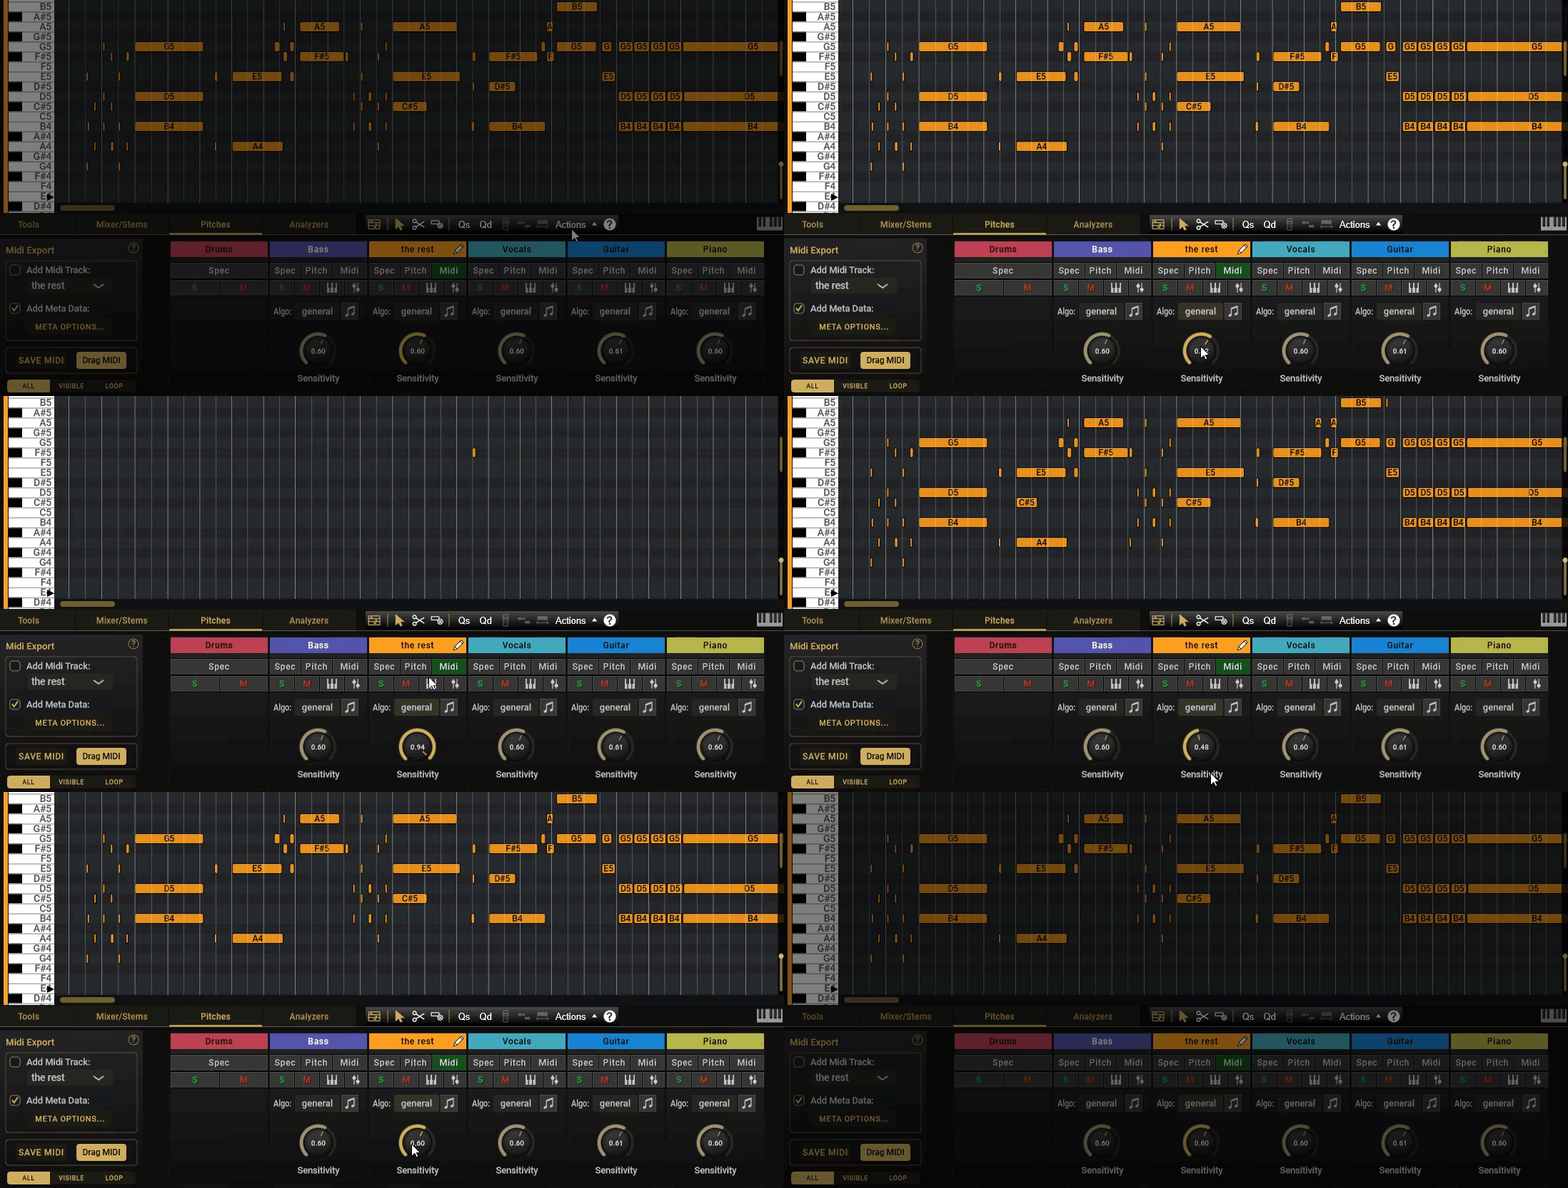
- Sensitivity controls the threshold used to detect MIDI notes. Higher values (more sensitive) produce fewer notes.
In the following clip, we adjust the Sensitivity. To reset the sensitivity to its default value, double-click the knob.
Editing Midi Notes
Song Master Pro contains a full featured MIDI editor that allows you to edit directly in SMP.
Edit Mode
By default, the MIDI notes are in read-only mode. You enter Edit mode by clicking on the Edit button in the toolbar (discussed in next section), From the main Notes menu, or by right-clicking in the display area and toggle "Note Editing".
- When in edit mode, only one stem track is editable at a time.
- To change the active editing stem track, click the header to move the "pencil" icon to it.
Toolbar
The MIDI editing toolbar is displayed at the top of the Bottom Panel whenever the Pitch tab is selected.
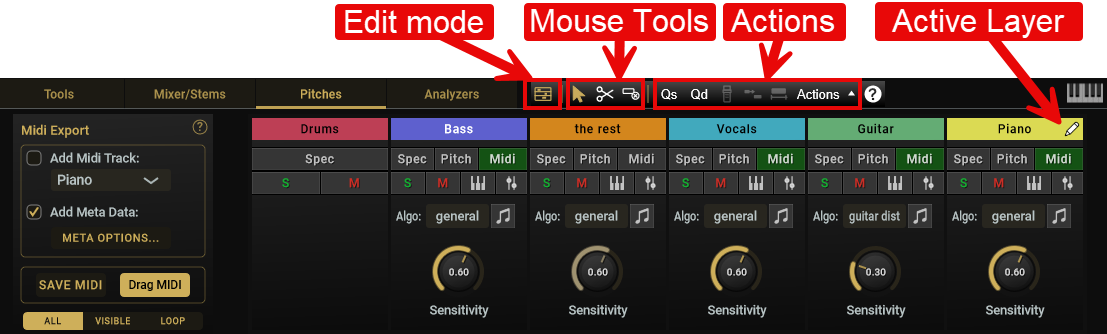
- Edit mode button to toggle editing
- Mouse Tools:
- Smart tool - use for most selection and note editing tasks
- Split tool - use to split midi notes at clicked point
- Delete tool - when activated, clicking a note will delete it
- Action Buttons
- Quantize Starts - quantize note starts (uses current snap setting)
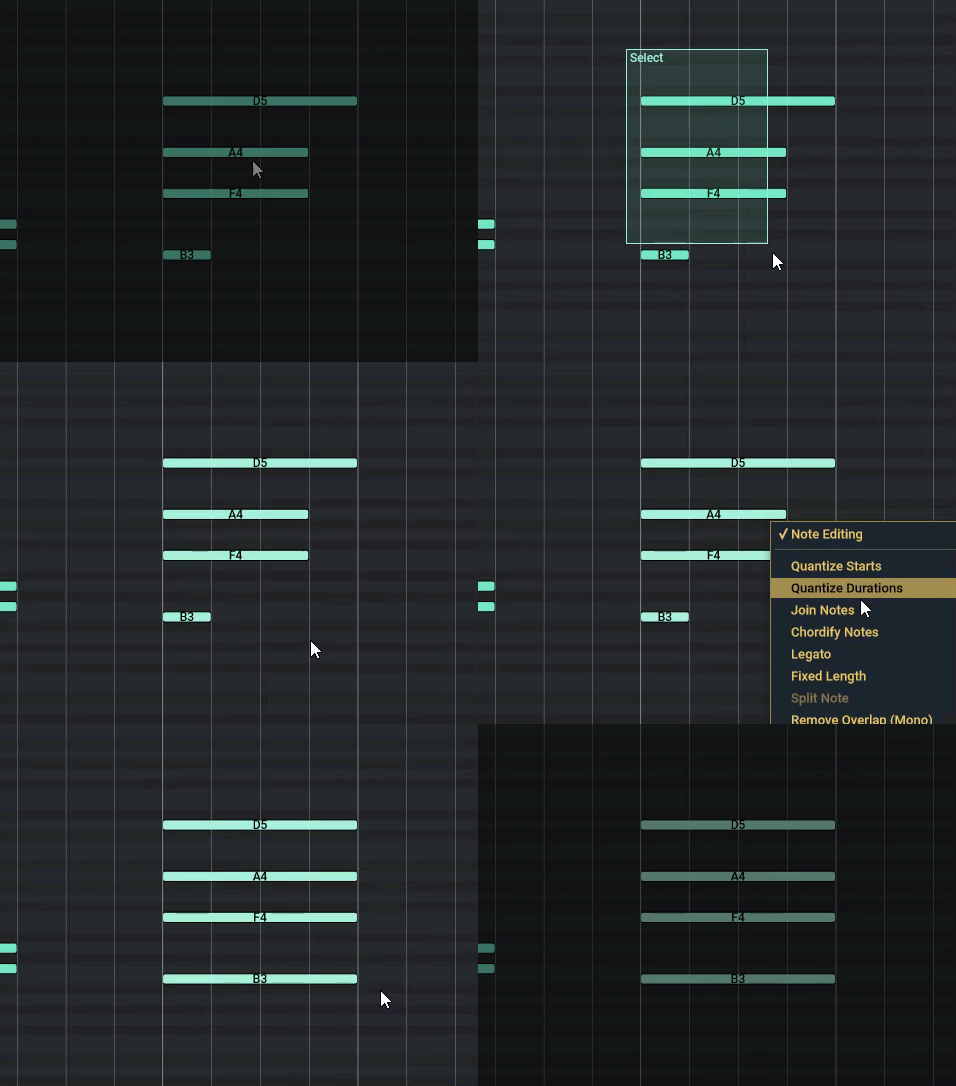
- Quantize Durations - quantize note durations (uses current snap setting)
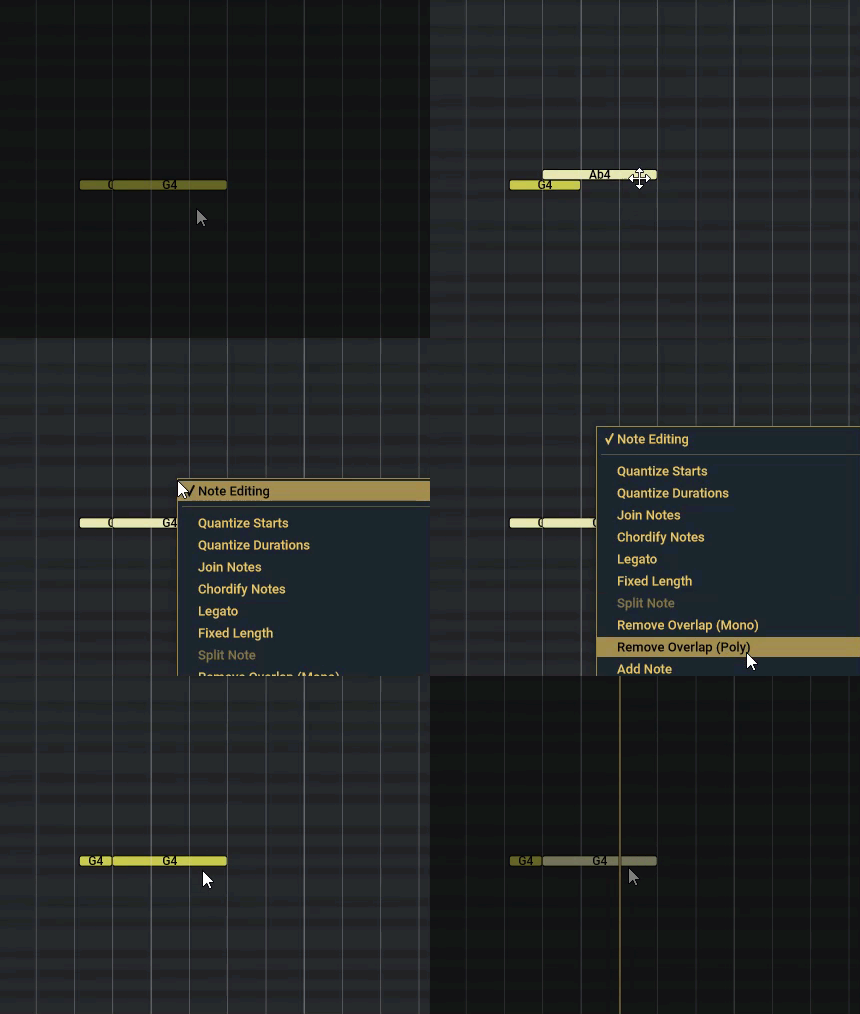
- Join Notes - join all selected notes on a per row basis (may select multiple rows)
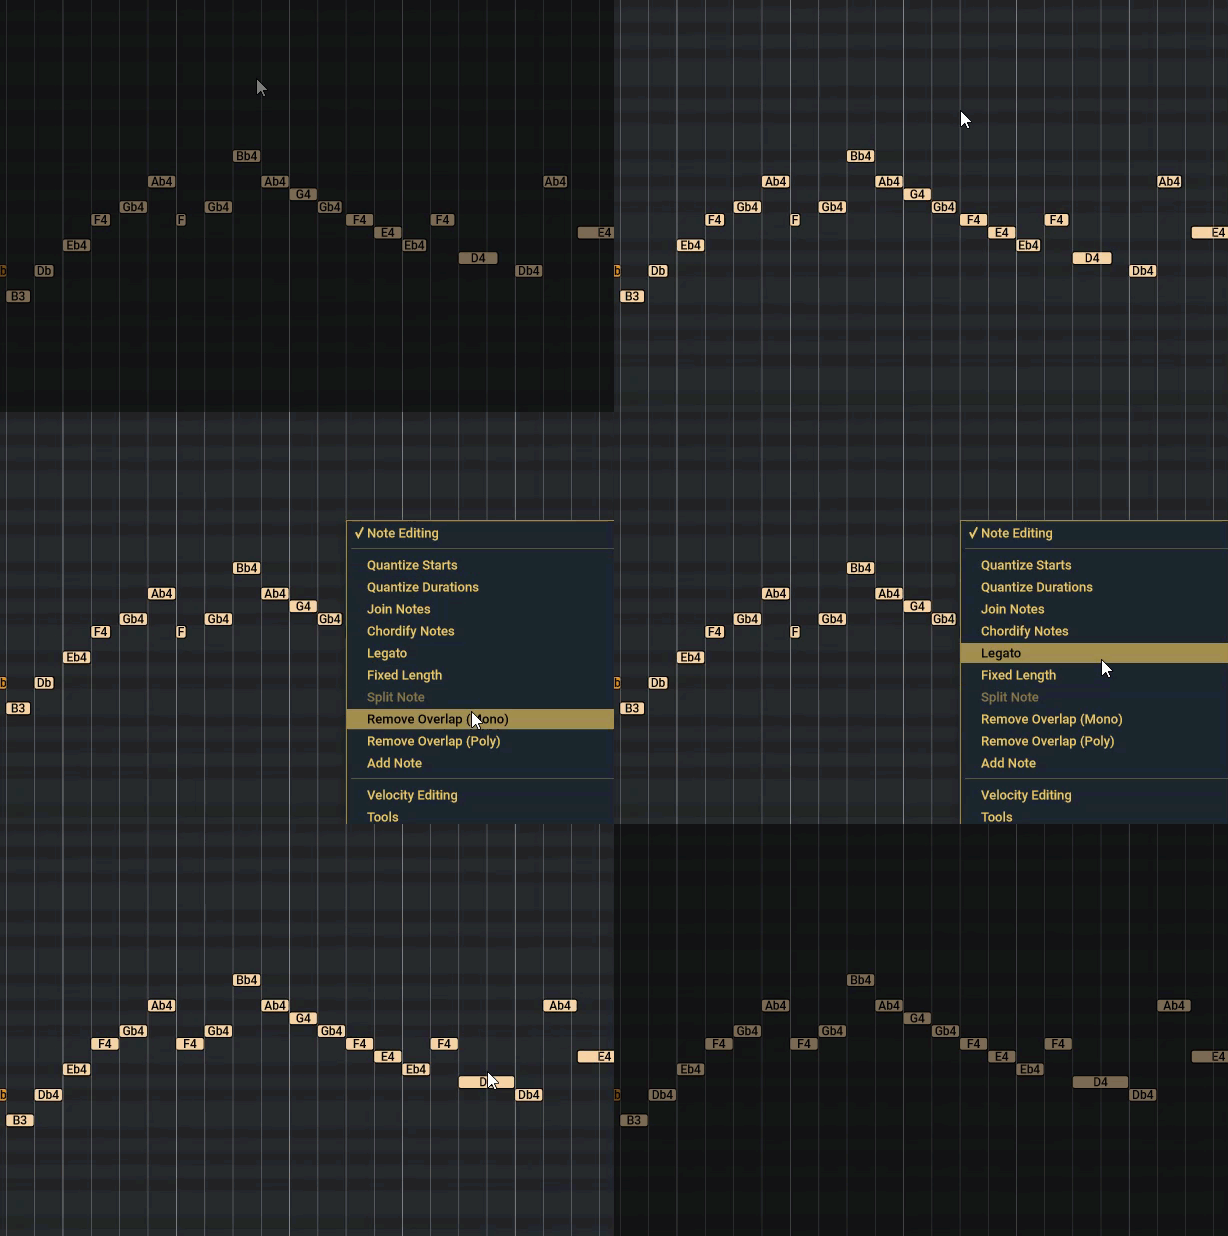
- Legato - use to lengthen and trim notes for solo/mono note seelction
- Fixed length - note durations are set to the current snap setting
- Actions menu (select notes before clicking)
- Velocity Editing - toggle editing of note velocities
- Quantize Starts - quantize note starts (uses current snap setting)
- Quantize Durations - quantize note durations (uses current snap setting)
- Quantize Starts & Durations
- Join Notes - join all selected notes on a per row basis (may select multiple rows)
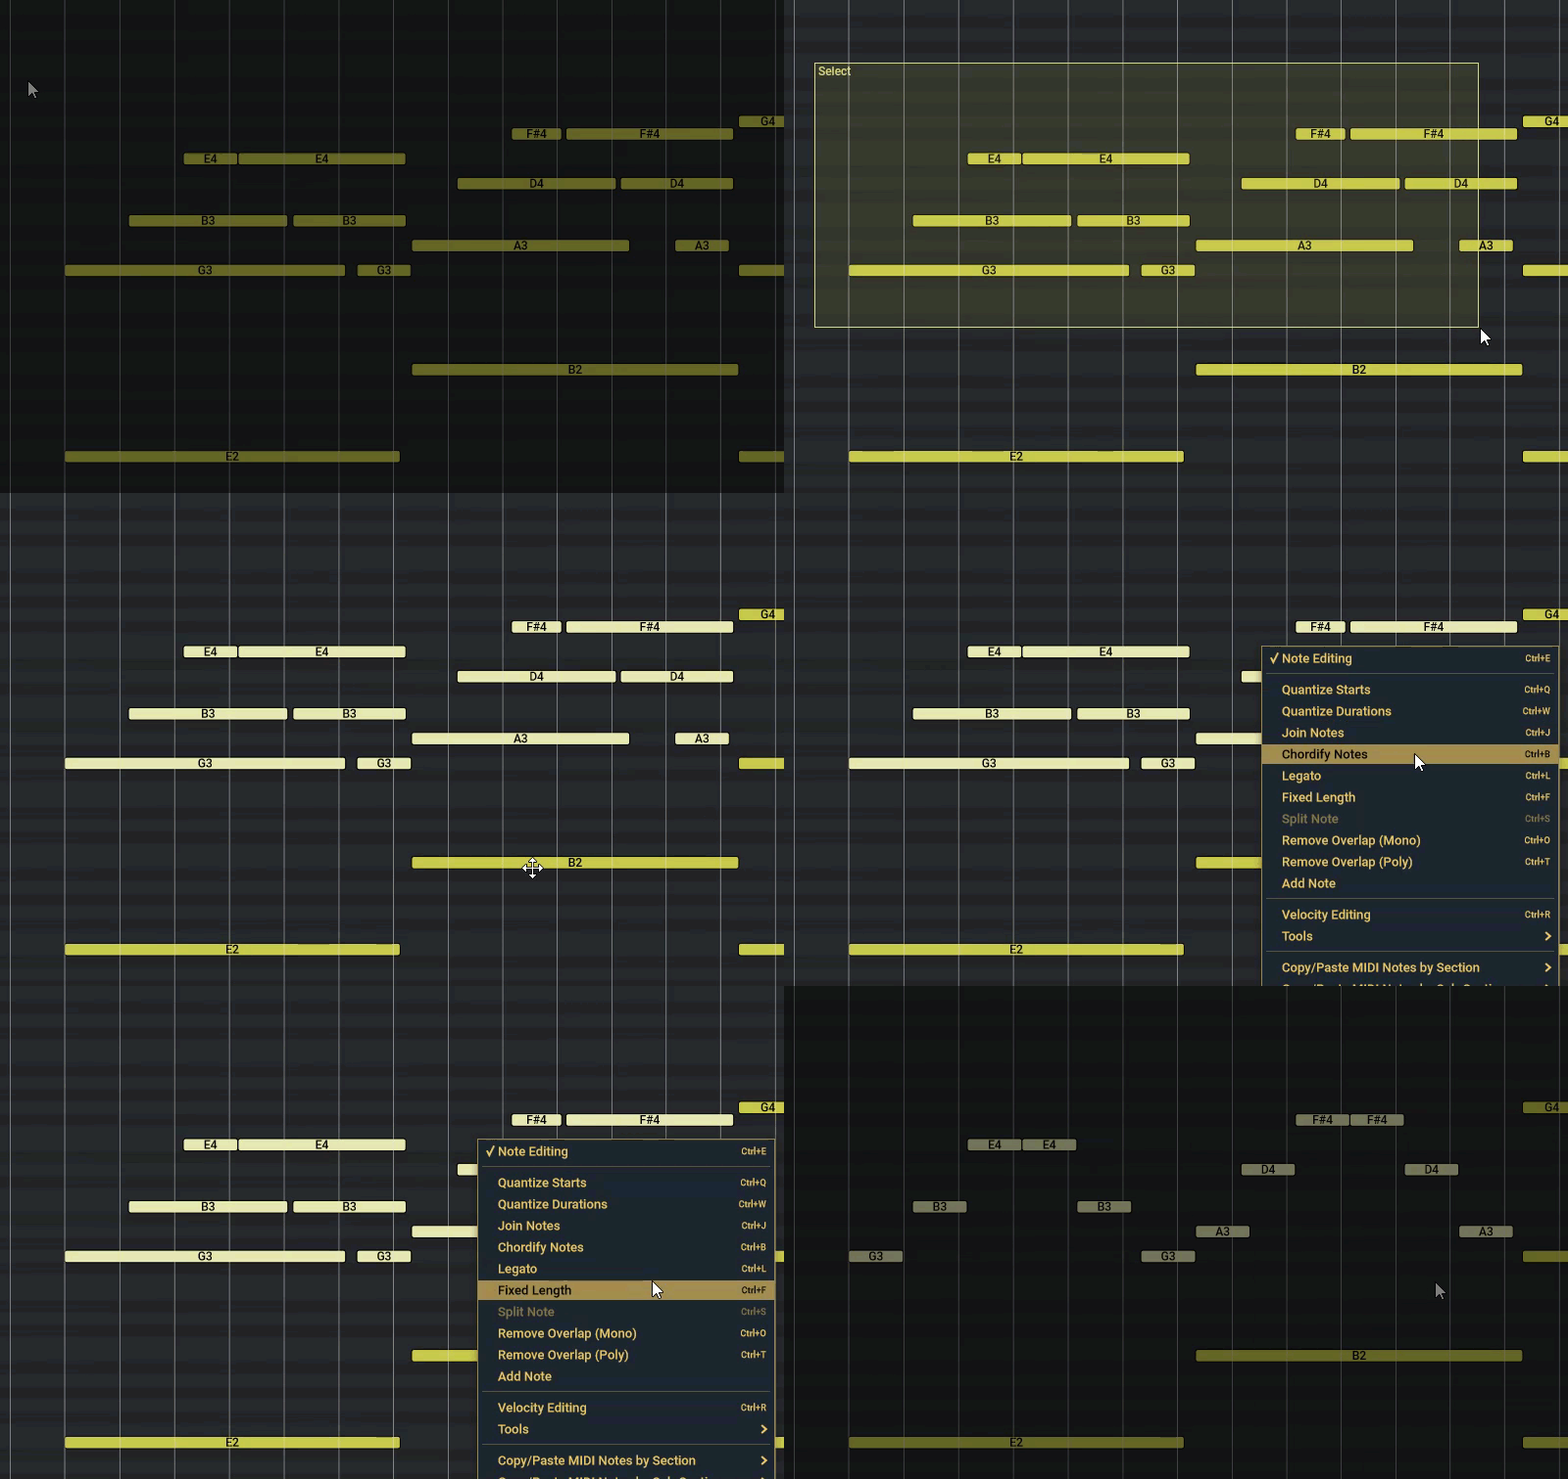
- Chordify - extend selected notes to have same start and end times
- Legato - use to lengthen and trim notes for solo/mono note seelction
- Fixed length - note durations are set to the current snap setting
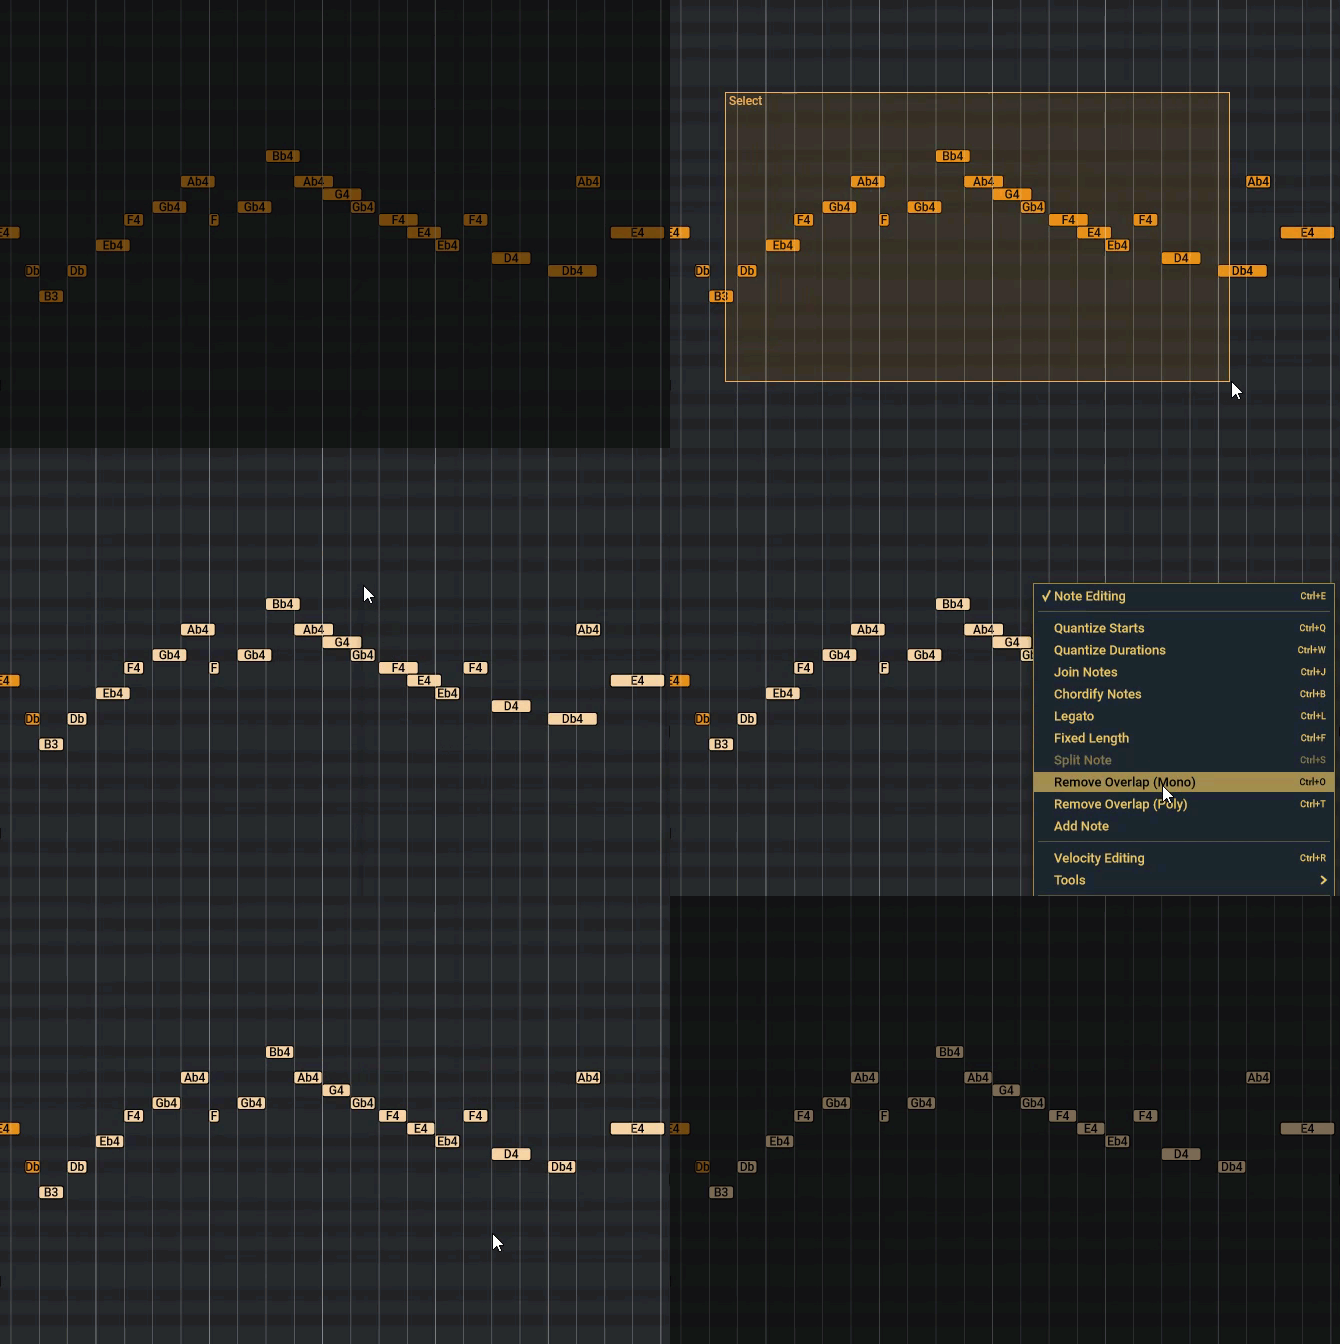
- Remove Overlap (Mono) - make the selected notes mono-phonic (only one note playing at a time)
- Remove Overlap (Poly) - trim notes that may overlap in the same row
- Help button - displays note editing shortcut keys
Adding MIDI Notes
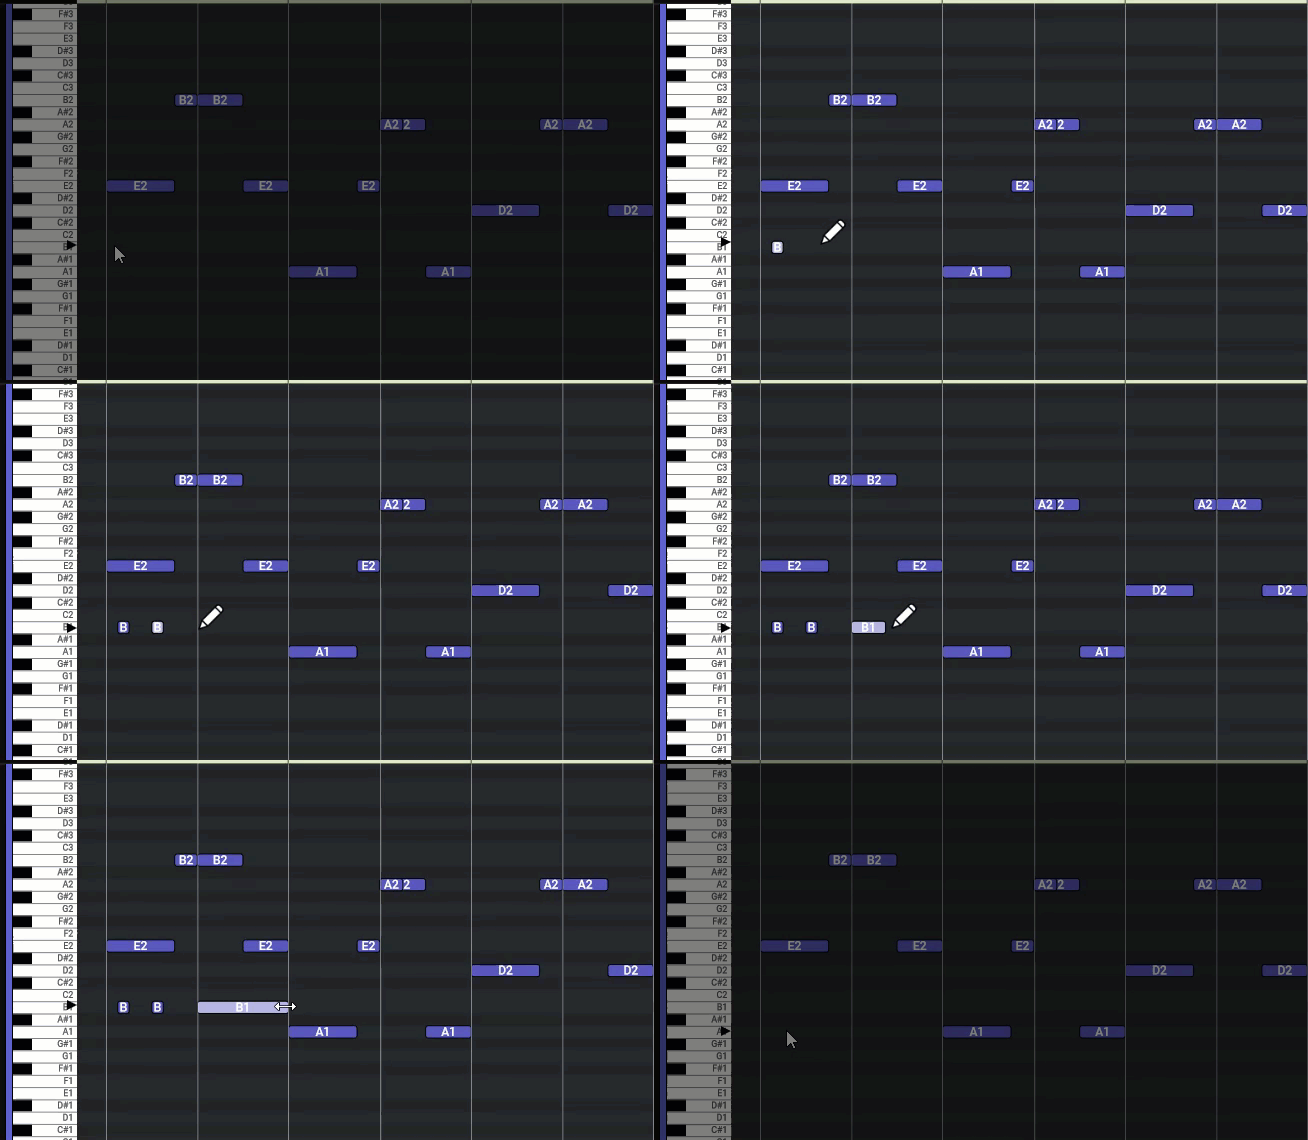
You must be in Edit mode to add notes. Add MIDI notes by Alt + mouse-click at the time you want the note to start. By default the duration of the note is determined by the current Snap setting. If you click and drag, you can draw a note with the duration of the drag.
In the video below, 2 notes are added by Alt-clicking then a third note is added by Alt-click-and-drag.
Selecting MIDI Notes
-
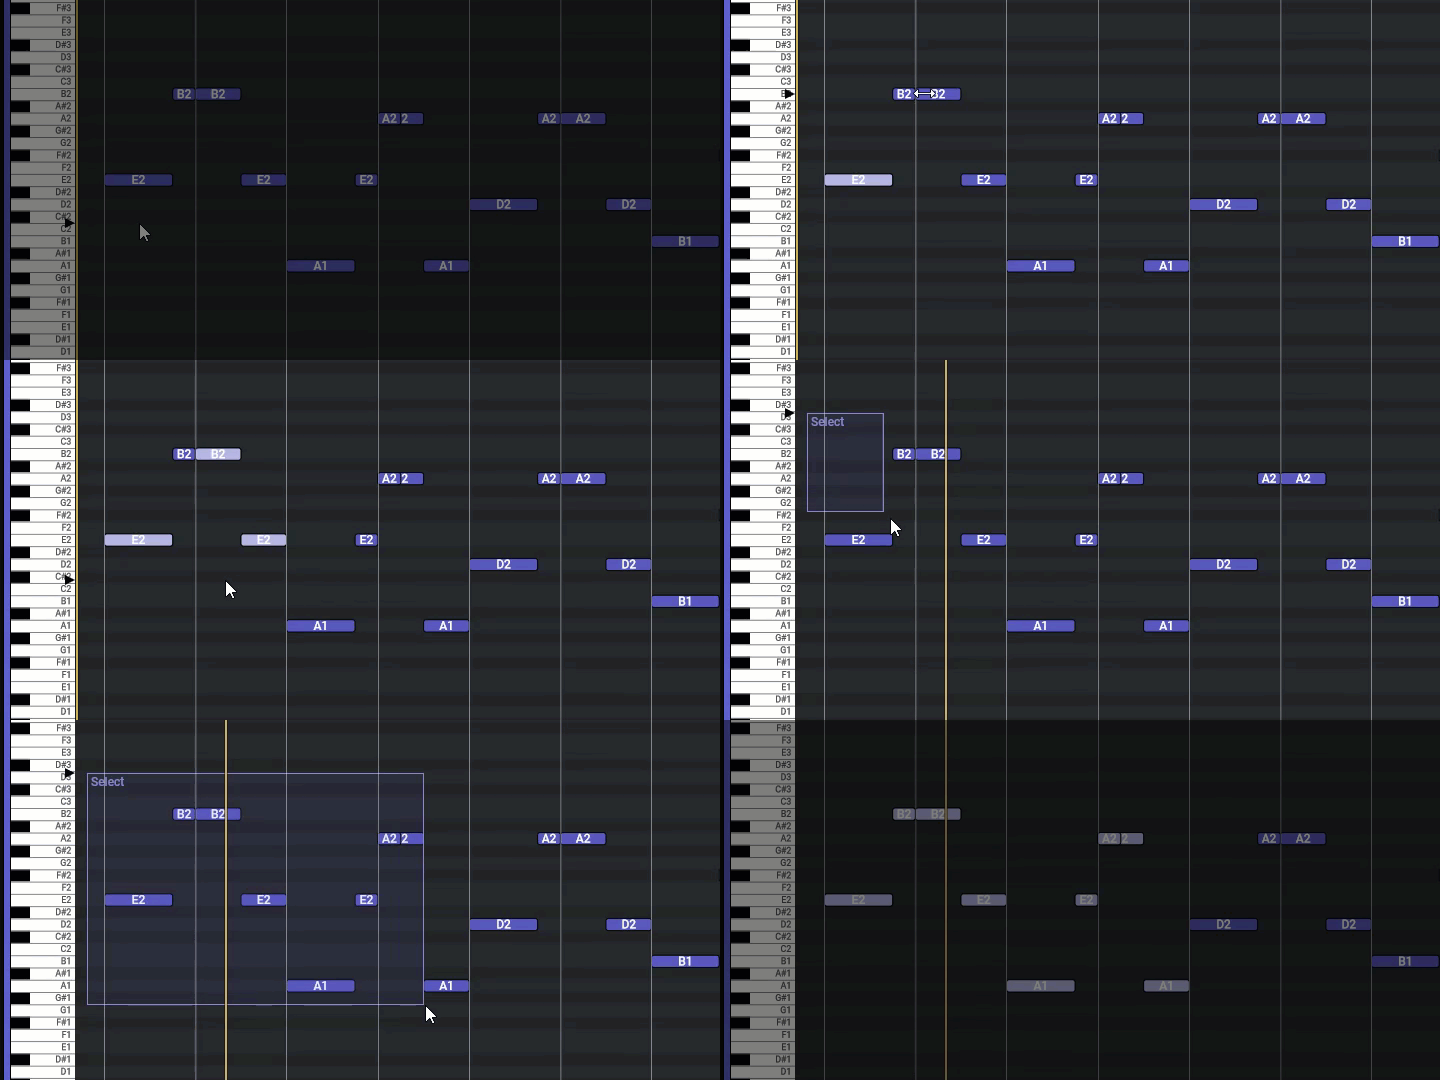
To select a note, click it.
-
Add notes to a selection by holding down Shift and click the note(s); you can remove a note from the selection by Shift clicking it.
-
To clear selected notes, just click in an area with no MIDI notes.
-
To select All notes, Ctrl + a
-
To select a cluster of notes, rubber-band select notes by clicking in an empty spot and dragging a rectangle around the notes to select.
Midi Edit Commands
(Apologizes if you find all the animated images distracting)
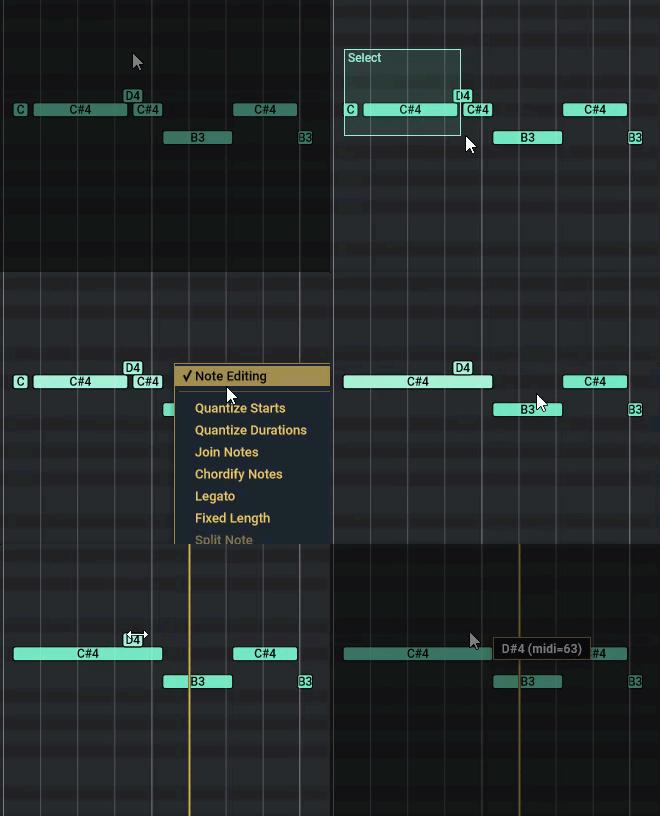
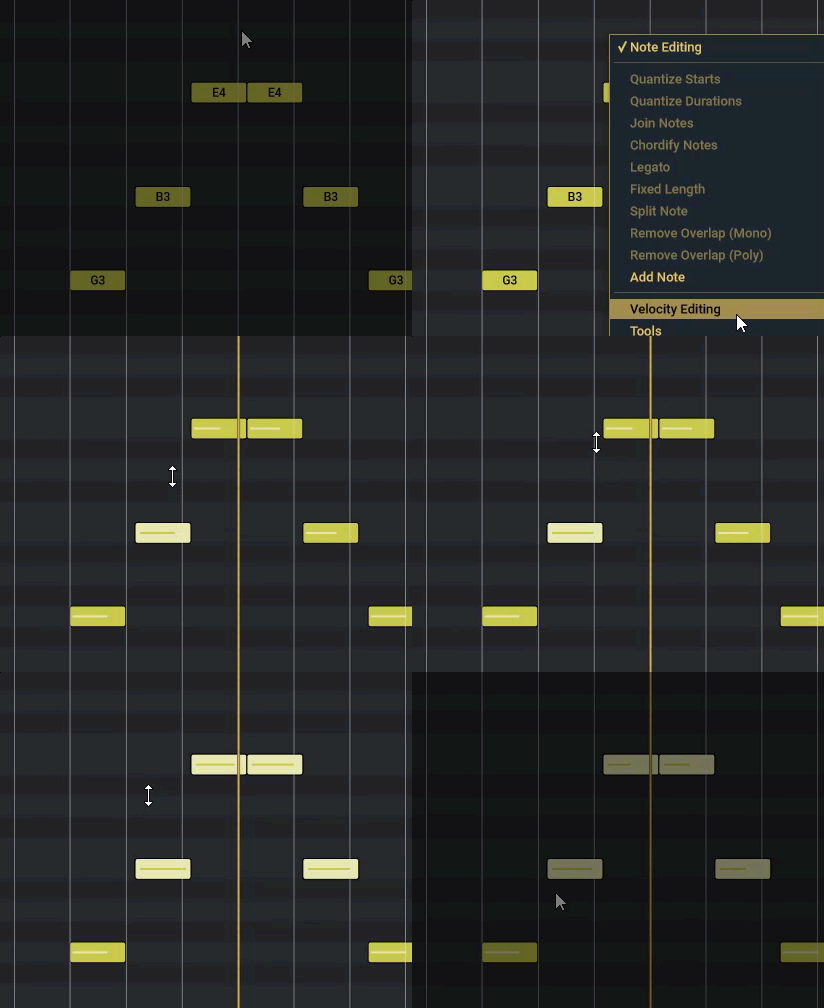
Scrolling and Zooming
All the options for scrolling and zooming in the Waveform view apply to the Pitches view. However, you also need to be able to zoom and scroll vertically as well as horizontally. There are numerous ways to scroll and zoom the pitch viewer:
- Scroll Time (horizontal) mouse-wheel
- Zoom Time (horizontal) with Shift + mouse-wheel
- Zoom vertically - Ctrl + Shift + mouse-wheel
- Zoom vertically - use the slider at the bottom of the horizontal scrollbar
- Scroll vertically - Shift + mouse-drag the piano
- Pan - Ctrl + Shift + left-mouse-drag
- Zoom into a region - Ctrl + Alt + mouse-drag to draw a rectangle over the region to zoom in on.
- Restore zoom to previous - If you Zoom into a region, you can quickly go back to the previous zoom level by right-clicking and selecting Restore previous Zoom
Vertical Piano
The area to the left of the Pitch view displays a keyboard showing the notes corresponding to each row of the Pitch view and a colored bar that corresponds to the range of the instrument played on the track.
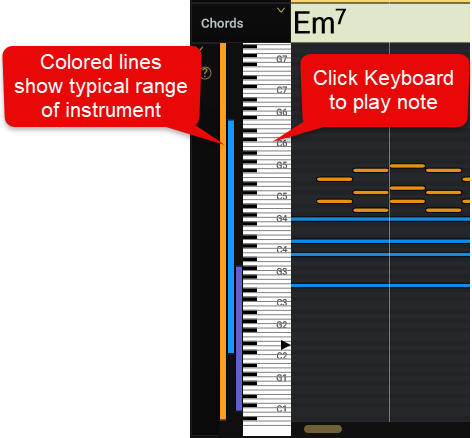
Pitches appear on Piano bar
The Pitch View uses the Piano Bar to display the notes at the current playhead. The notes on the Piano Bar are color coded using the color assigned by the auido track's label set.

Exporting Midi Data
The midi data for a track can be saved to an external file or drag-and-dropped into a DAW or midi editor. You also have the option to export a variety of data as MIDI meta-data. You do all this from the first panel on the Pitches tab.
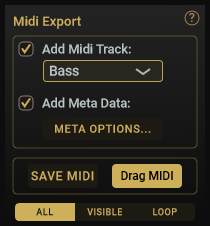
As you can see, this panel is divided into three groups.
Specify Midi Data to Export
The top group of this panel is where you specify what you want to export.
Check the Add Midi Track box if you want to export midi notes, and if so, select the track to export from the dropdown. Note you can only export one track at a time.
Check the Add Meta Data box to export meta data. To select the data to export, click Meta Options.... Clicking Meta Options... opens up the following dialog:
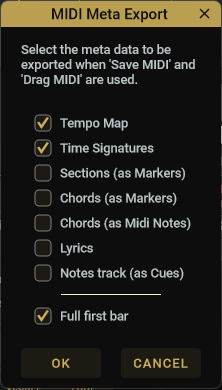
Not all DAWs will import the midi meta data selected from this dialog. You will need to consult you DAWs documentation (or just try and see what data it imports). However, some DAWs will give you an error if you try to import midi meta data that it doesn't allow.
Export the MIDI Data
The second group in the Midi Export panel, is where you can export the data to a file or drag-n-drop it to your DAW. Click the Save MIDI button to save it to a file. To Drag-n-drop it into your DAW, start the drag operation from the Drag MIDI button.
Specify Time Range to Export
Finally, the third and bottom section of the Midi Export panel is used to select the time-range for the midi data to be exported. Select All to export all midi, Visible to only export the notes that are visible, and Loop to export only the notes in the active loop.
When exporting midi data to a DAW, you will usually want to export the Tempo Map first (or with the first Midi Track). Importing the Tempo Map is crucial to getting the data from Song Master Pro to align with the bars in the DAW.
Some DAWs will only import a tempo map if it is imported as a Midi File and a new project is created.