Send and Receive OSC Messages
Open Sound Control (OSC) is a networking protocol standard that allows music applications and devices to communicate with each other. Song Master implements OSC which allows for other OSC applications to control Song Master as well as having Song Master send OSC messages to other OSC music applications.
Sending OSC Messages
Before you can start sending OSC messages from the Ext Control track, you must provide Song Master with the IP address and port number that the other application uses to receive OSC messages.
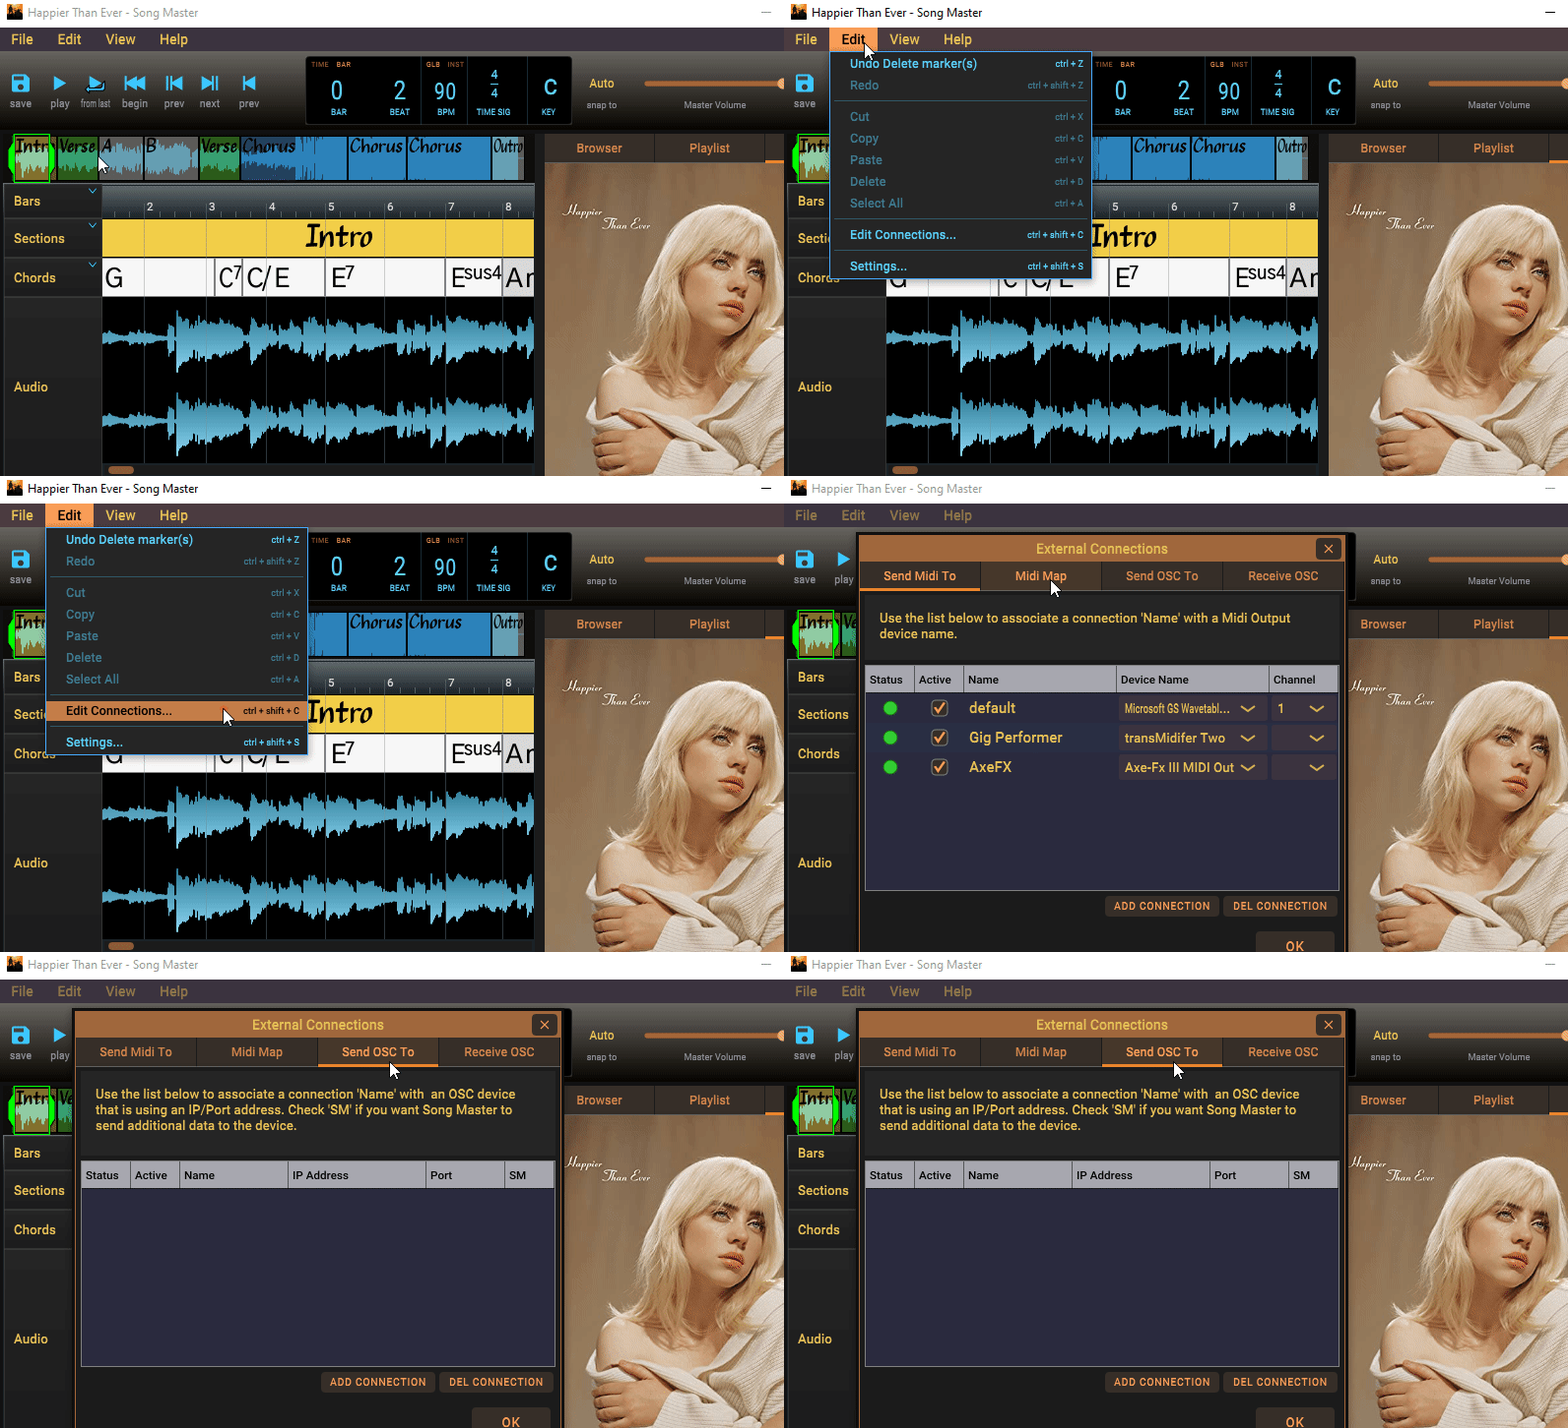
You manage these connections on the Send OSC To tab on the External Connections dialog. To open the External Connections dialog, go to the Edit menu and select "External Connections...".

To add a connection, click the Add Connection button near the bottom of the Send OSC To tab.
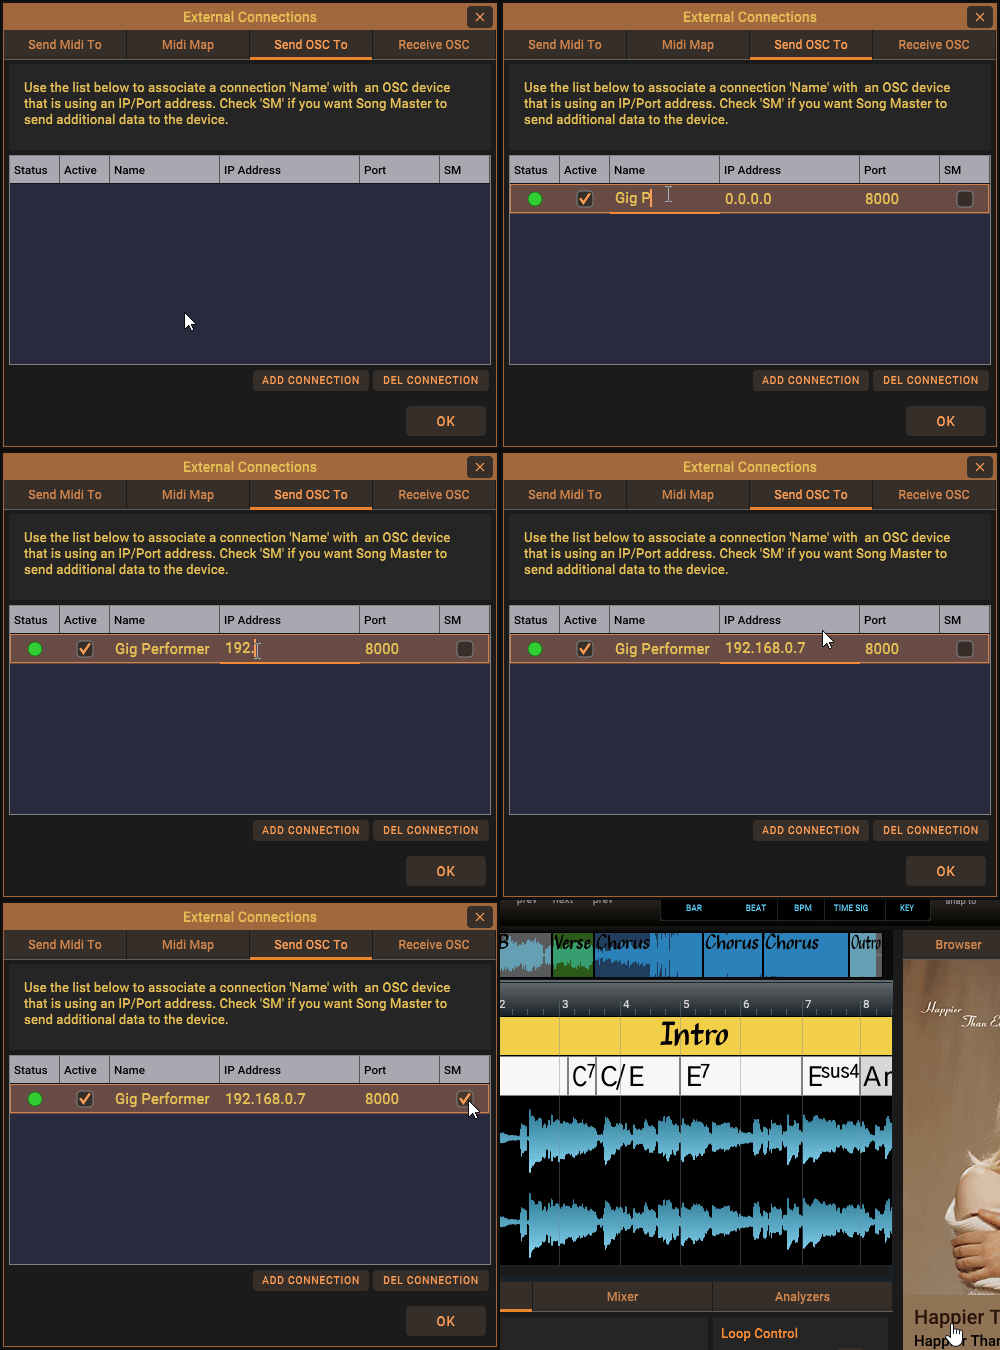
For the new connection, double-click it's Name column and enter a friendly name for the connection (this can be anything you want, usually, it should be the name of the application you are connecting to).
An OSC connection is defined by an internet address (IP) and a port number. The internet address is the IP of the computer that the application is running on. You will also need to find the port number that the application is using; usually this will be defined by the application as one of its settings that you can change.
Double-click in the IP Address column and enter the IP address that the application is running on along with the Port number it is using.
The SM column is used to have Song Master send lots of dynamic information to an OSC application. For example, when checked, Song Master will send the name of the song when loaded, the section name, bar, and beat that the playhead is currently in, the value of the Speed slider when it is changed, plus other potentially useful data.
Usually, you will only need to check this box if you want to display this information in the other app; if you just want to send commands to the other app via the Controller track, then you probably will not need to check this.
The Active checkbox allows you to easily enable or disable the connection.
If you have additional OSC applications, you can create connections for them also.
Refer to Controllers Track to learn how to send OSC messages using the connections you've defined here.
Example: Adding an OSC Connection
In the screen shot below, the OSC application that we will be sending OSC messages to is called Gig Performer. We got the IP address and port number from Gig Performer's OSC Setup dialog ("Gig Performer IP address" and "Gig Performer listening port"). We also check the SM box; when SM is checked, Song Master will send additional dynamic OSC messages.

Receiving OSC Messages
Song Master can also respond to OSC messages sent by other applications. This allows for OSC controllers (i.e. TouchOSC, Lemur) to manipulate Song Master's UI from external devices like an iPad, iPhone, or Android device.
External OSC controllers need to be told the IP address and the port number to send their OSC messages to. The IP address is determined by the computer the application is running on, however, the port number is something that can be manually defined. Each OSC application running on a computer must be assigned a unique port number.
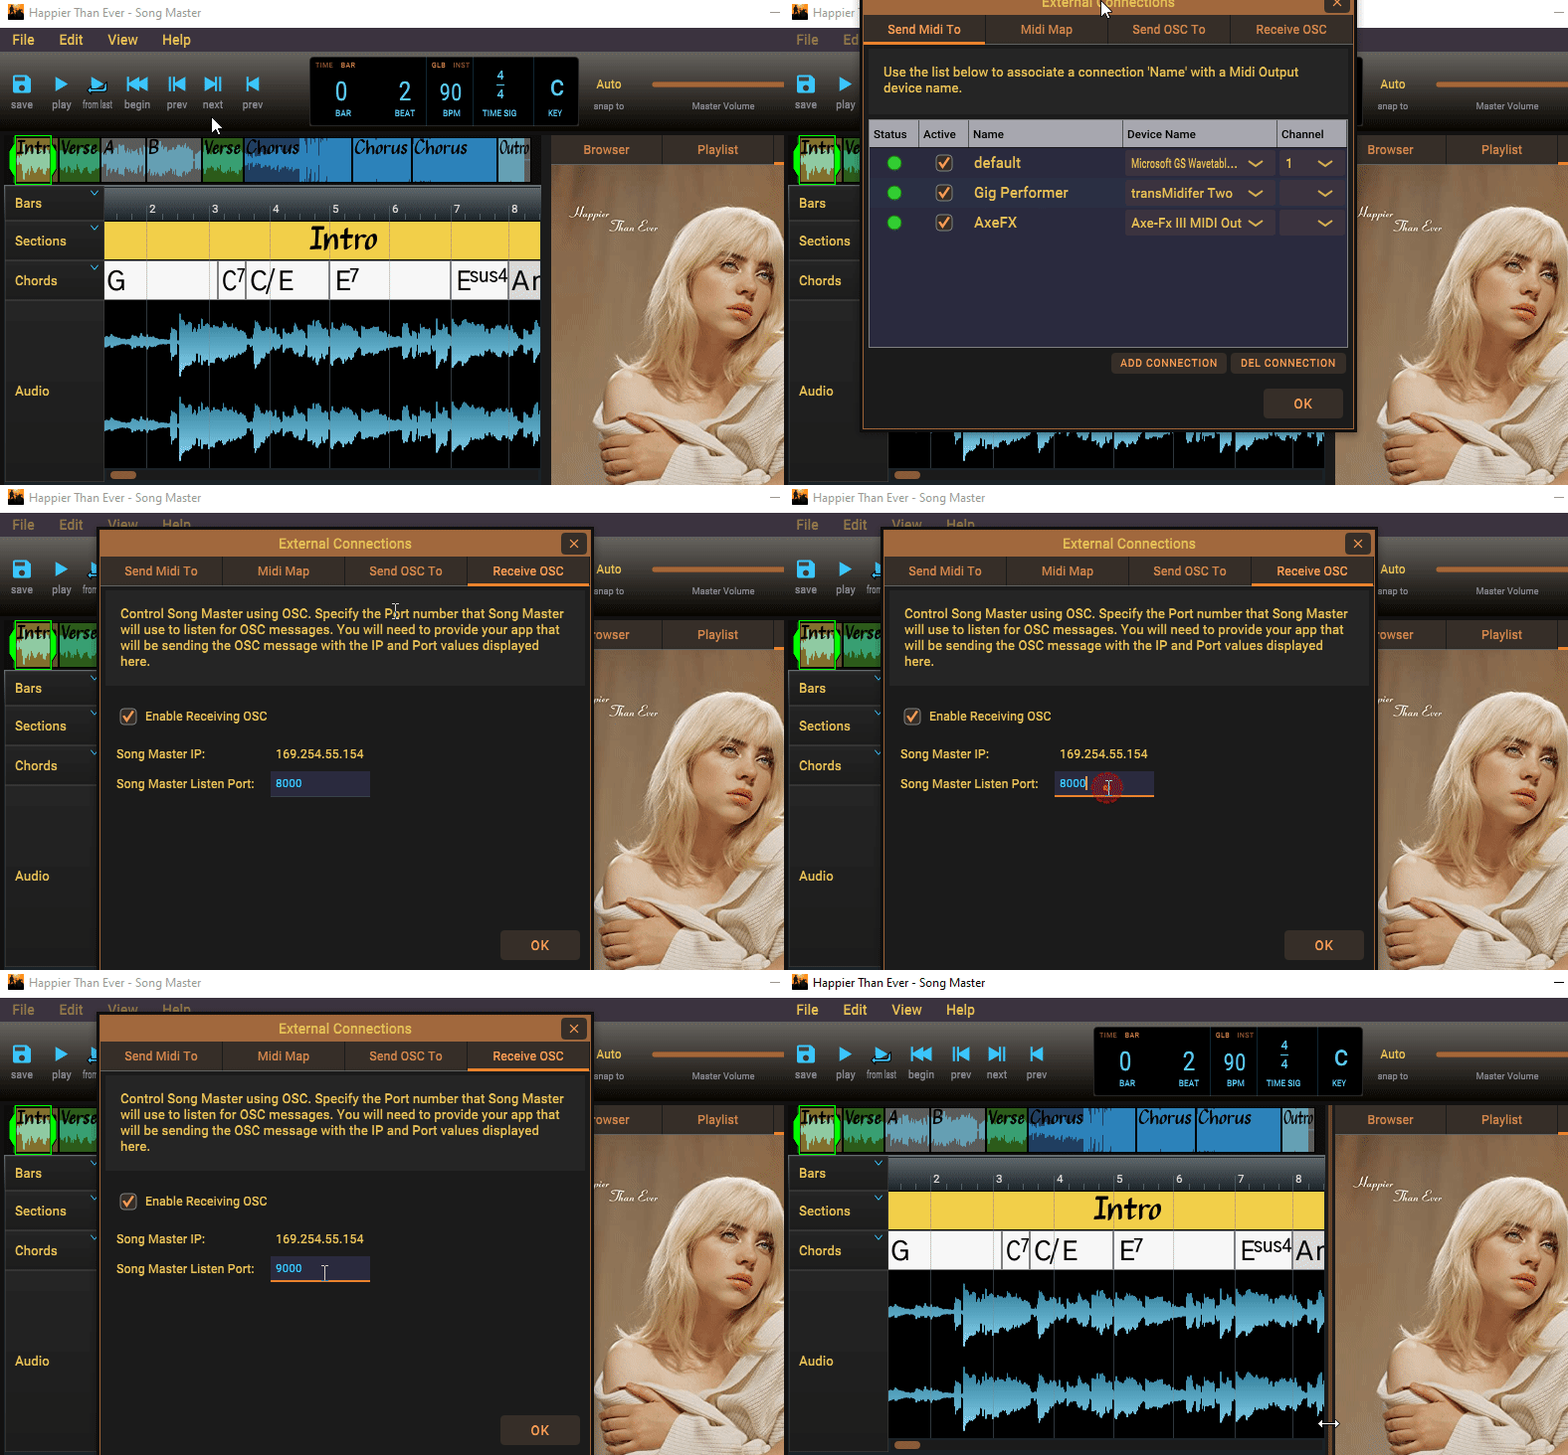
By default, Song Master uses port number 8000. If you want to use a different port number, then you can modify the Song Master Listen Port field on the External Connections dialog's Receive OSC tab. You can also enable and disable Song Master responding to the OSC messages sent to it.
Example: Enable and Change OSC Port
In the screen shot below, we go to the Receive OSC tab, check that OSC support is enabled, and then we set the Song Master Listen Port to 9000.

Song Master's OSC Commands
Refer to the OSC Command Reference for a list and description of the OSC messages that Song Master can receive and send.